
1.Registration Process
1.1 Accessing the Registration Page
To create an account, follow these steps:
- Open your web browser and visit the IBIAB Business website:
👉 https://ibiab-business.com
- Click on the Sign-Up button or go directly to the registration page:
👉 https://ibiab-business.com/signup/
1.2. Entering Your Details
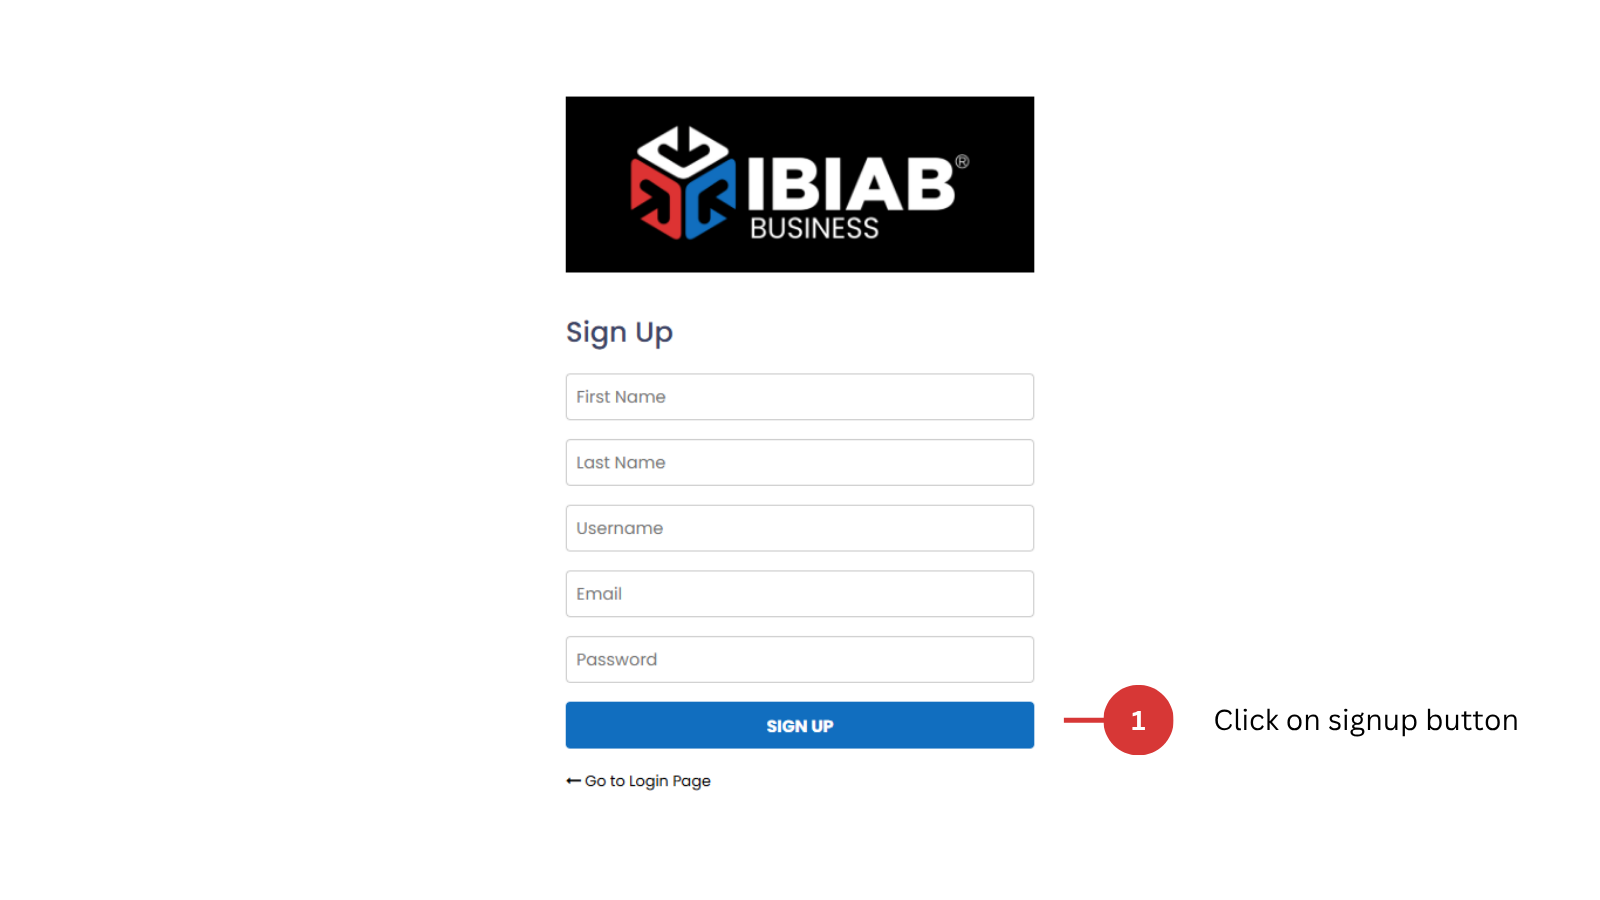
On the Sign-Up Page, you will need to provide the following information:
- First Name – Enter your first name.
- Last Name – Enter your last name.
- Username – Choose a unique username.
- Email Address – Enter a valid email address.
- Set your password (minimum 6 characters).
Once you have filled in all the required fields, click on the Sign-Up button to proceed.
1.3. Handling Errors
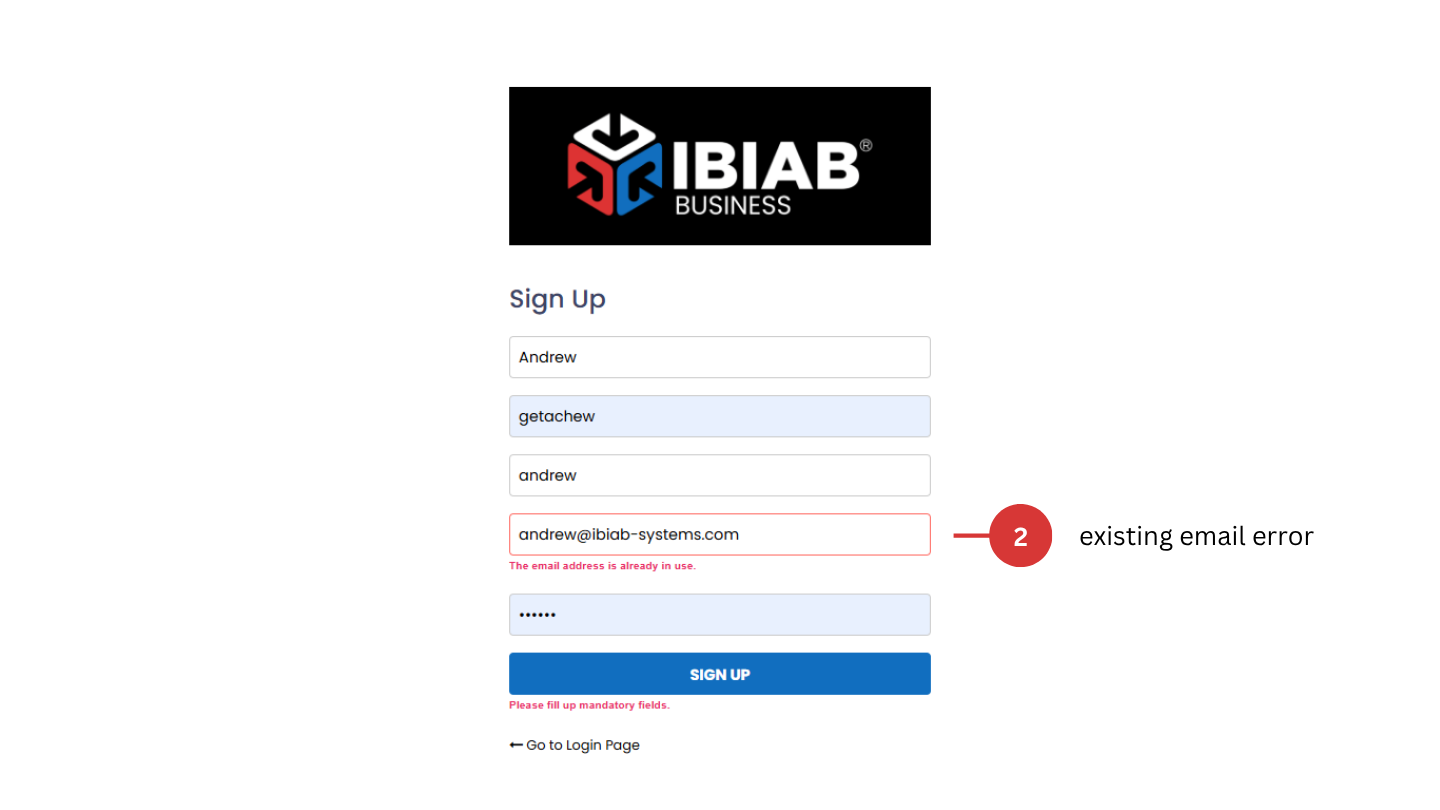
If the username or email you entered is already in use, the system will notify you to choose a different one. Update the fields and try again.
1.4. Successful Registration
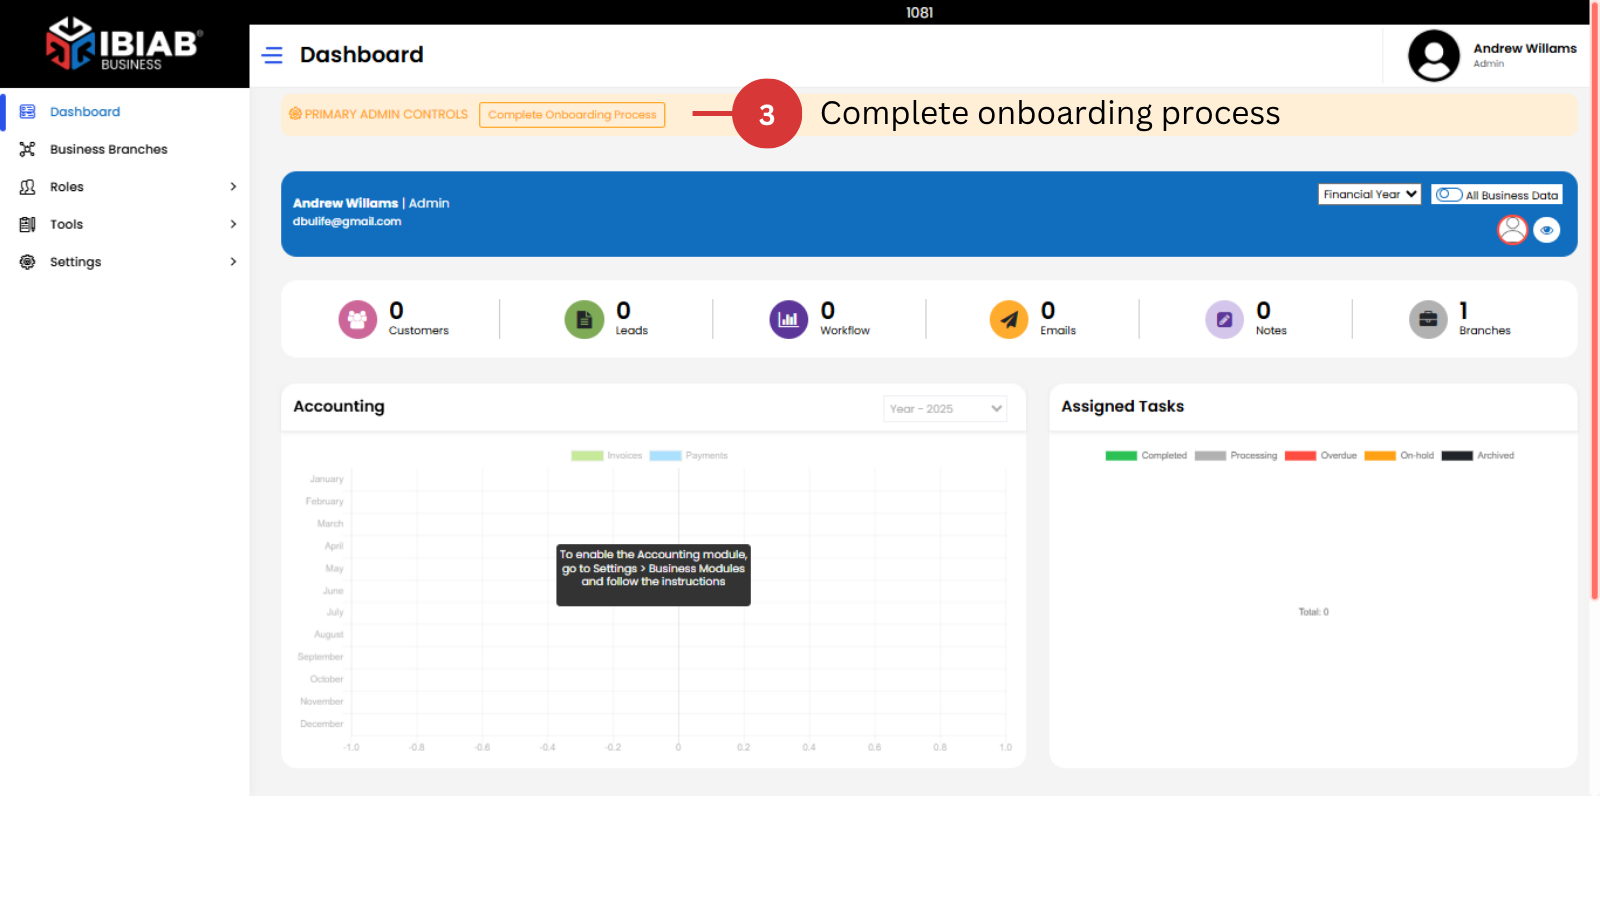
After successfully signing up:
✅ You will see a dashboard with complete onboarding notification message on the screen.
You will not be able to proceed to other sections until the onboarding process is complete.
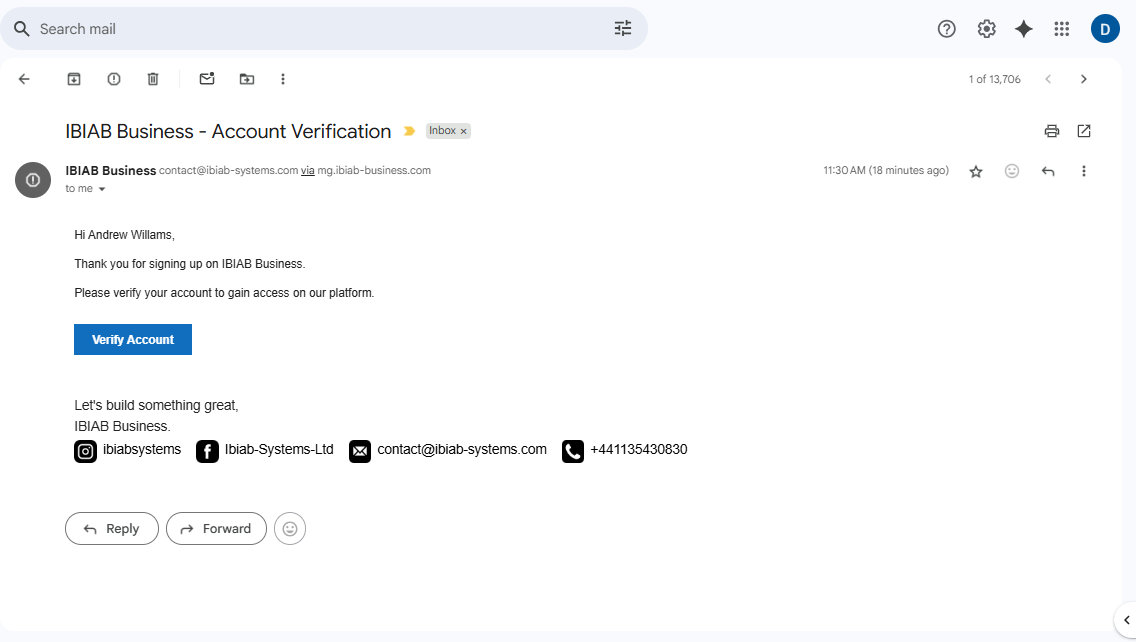
✅ A confirmation link will be sent to your email.
1.5. Email Confirmation
- Check your inbox for an email from IBIAB Business.
- Open the email and click on the confirmation link.
- Your account will be activated, and you will be redirected to the system login page.
📌 Tip: If you don’t see the email, check your spam/junk folder.
- Your account will be activated successfully.
after activating your account:
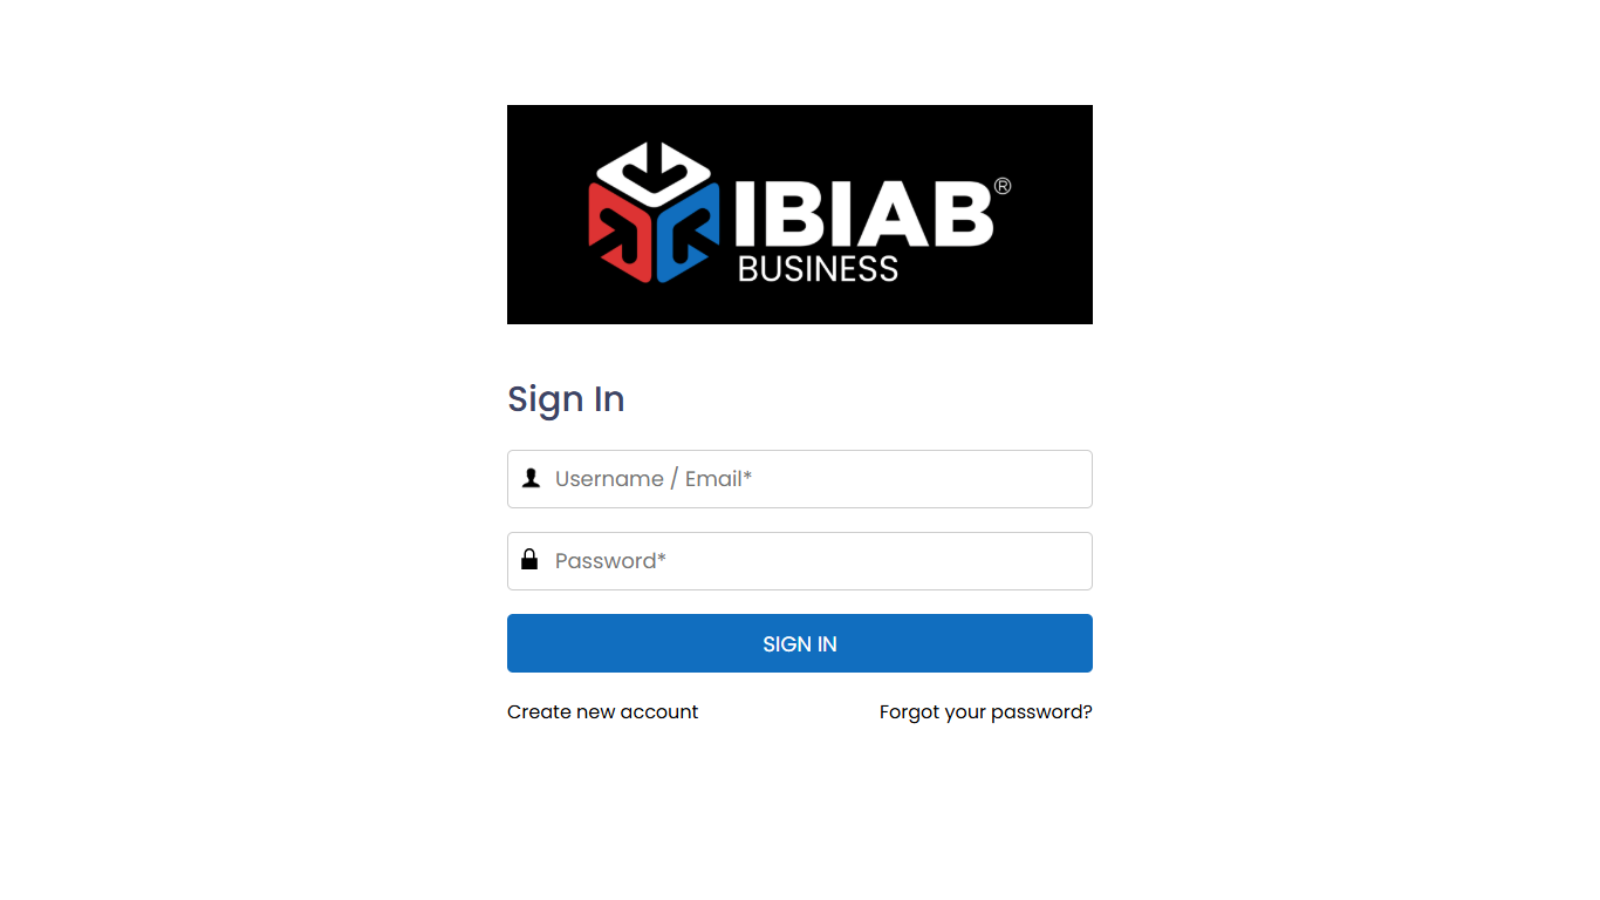
- Go to the Login Page:
👉 https://ibiab-business.com/login
- Enter your email/username and password.
- Click on Login to access your account.
1.7. Resetting Your Password
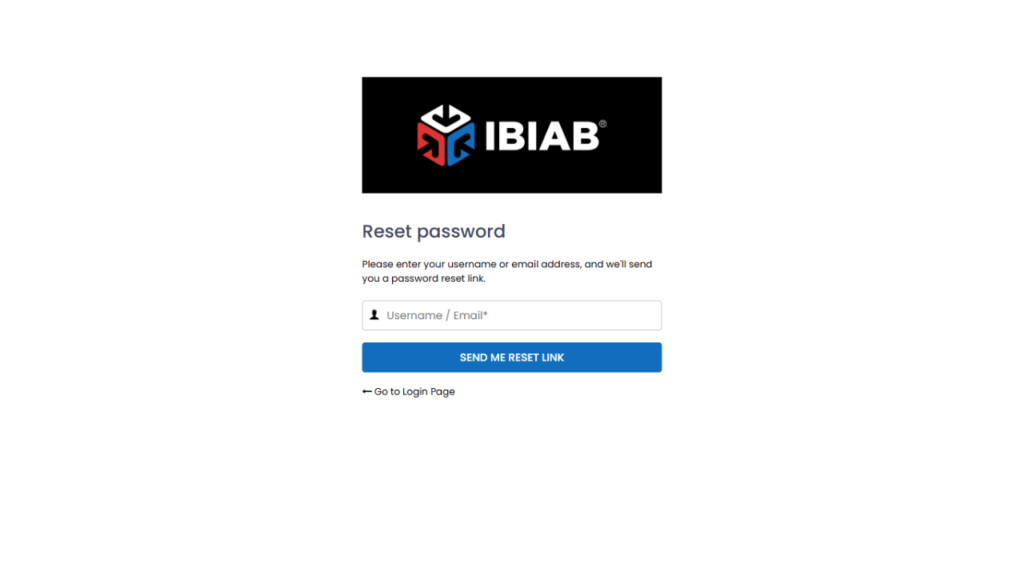
If you forget your password, follow these steps:
- Go to the Password Reset Page:
👉 https://ibiab-business.com/?action=lostpassword
- Enter your email address.
- Click on the Submit button.
- A password reset link will be sent to your email.
- Open the email and follow the instructions to create a new password.
1.8 Registering a New Business
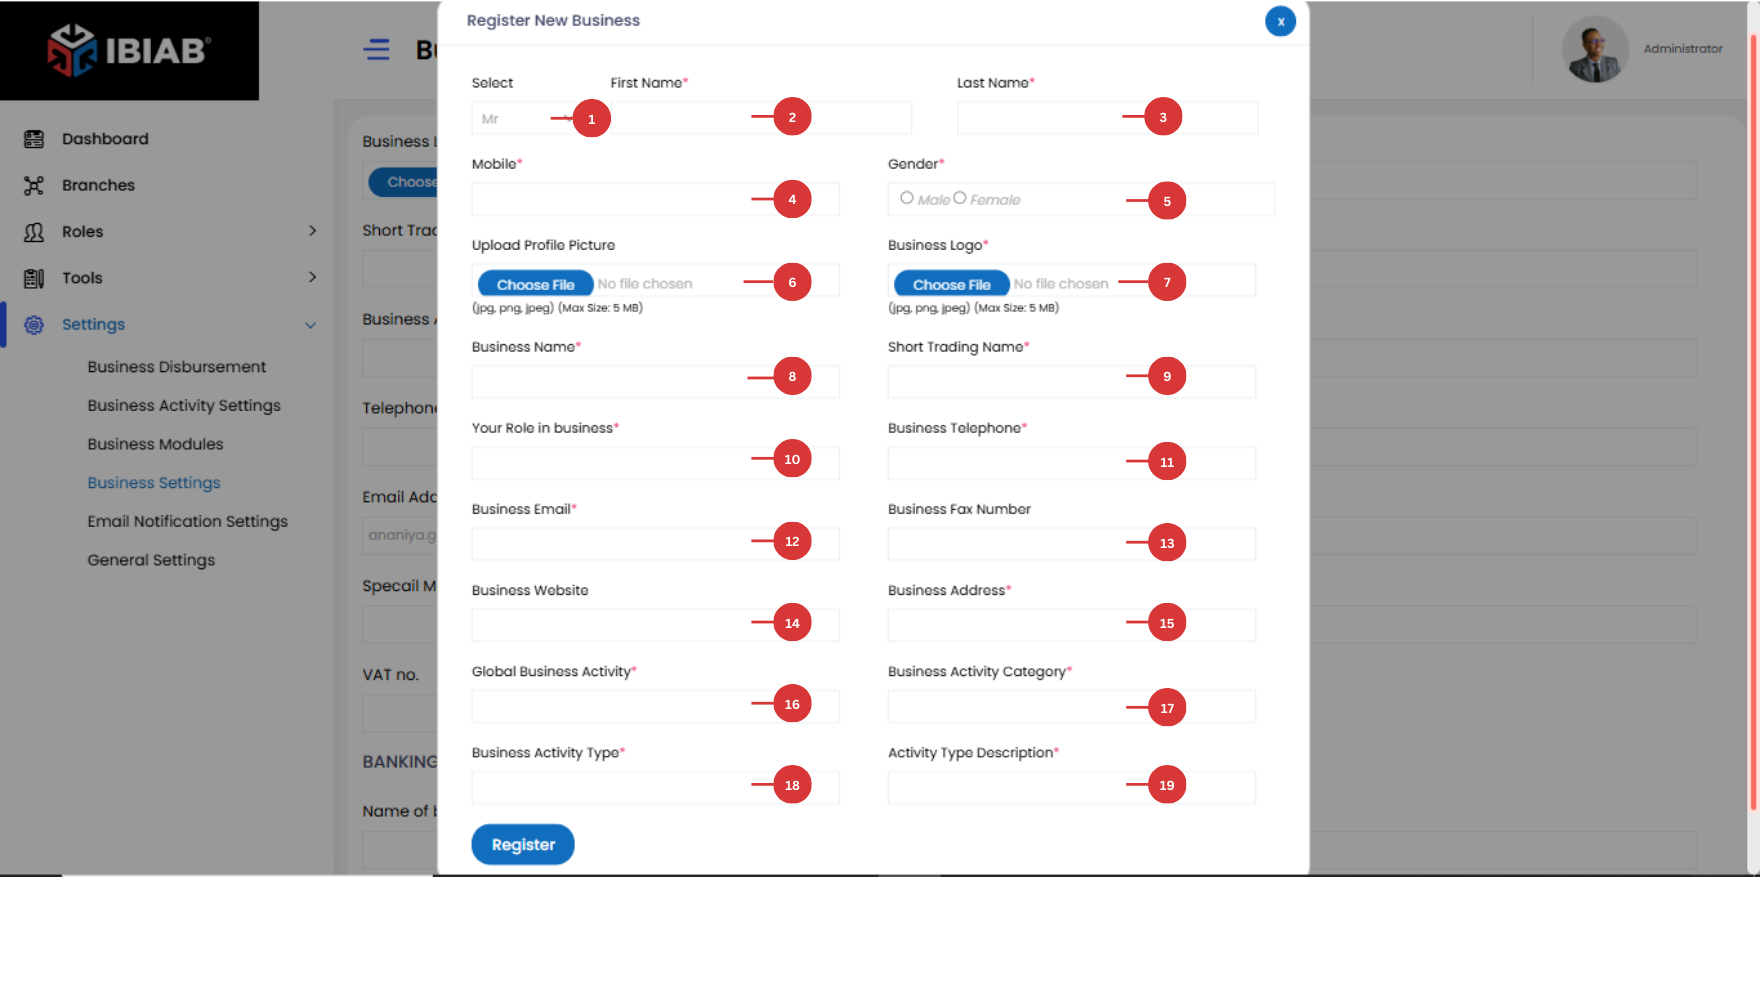
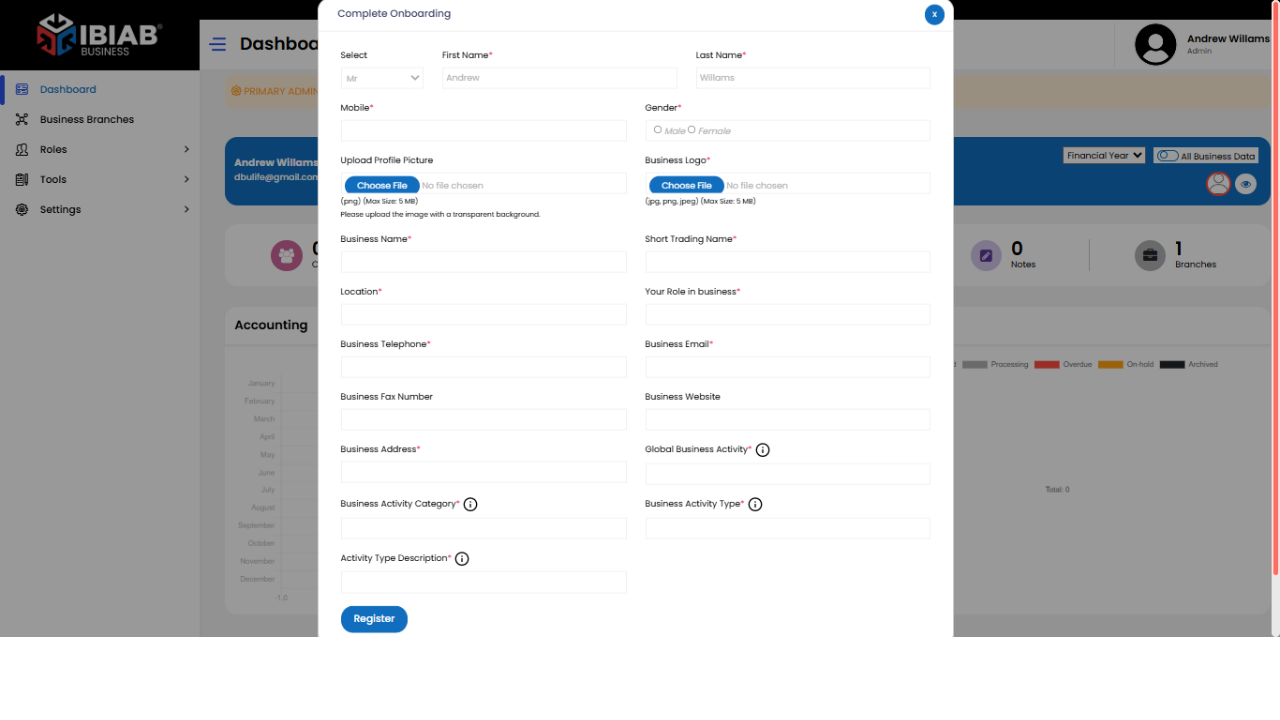
After logging in, You will see a dashboard with complete onboarding notification message on the screen. Follow these steps to register your business:
Fill in all the required fields
,
Personal Details:
- Select (Title) – Choose your title (e.g., Mr., Mrs., Ms.).
- First Name* – Enter your first name.
- Last Name* – Enter your last name.
- Mobile* – Provide a valid mobile number.
- Gender* – Select your gender.
- Upload Profile Picture – Option to upload your profile image.
Business Information:
- Business Logo – Upload your business logo.
- Business Name* – Enter the full name of your business.
- Short Trading Name* – Provide a shorter version of your business name (if applicable).
- Your Role in Business* – Define your role (e.g., Owner, Manager, Administrator).
- Business Telephone* – Enter the primary contact number for your business.
- Business Email* – Provide a valid business email address.
- Business Fax Number – (Optional) Enter your fax number.
- Business Website – (Optional) Add your business website URL.
- Business Address* – Provide the full address of your business.
Business Categorization:
- Global Business Activity – The primary category or sector your business belongs to.
- Business Activity Category – The secondary category your service/product belongs to.
- Business Activity Type – The third-level classification of your business.
- Activity Type Description – Provide details about the specific service or product you are offering.
Click the Register button to complete the business registration.
📌 Tip: After registering your business, you can update your information anytime by following these steps:
- Go to the Sidebar Menu.
- Navigate to Settings → Business Settings.
- Update the necessary details.
- Save your changes.