6.2. Email
When you click on the Email menu under the Tools section, a window will open showing various email-related functions. This allows you to manage email templates, letter templates, and directly send emails. Here’s a breakdown of what each section includes:
Email Section Overview:
List of Emails: A table showing all the emails sent, with details like the recipient’s name, subject, status, and date sent.
Review the history of emails sent to or received from the customer.
+ button to expand Action buttons
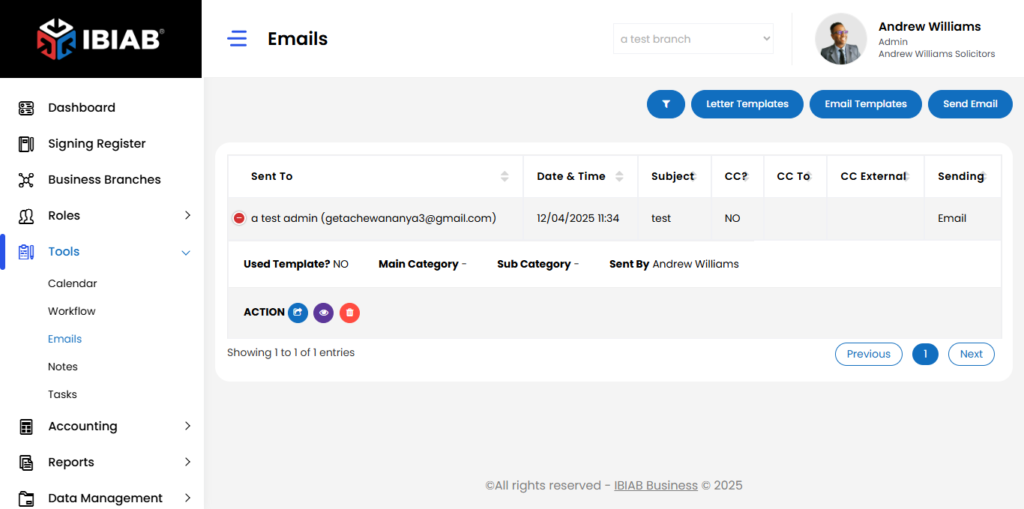
At the top of the page, you’ll find several important buttons:
1. Letter Templates Button
When you click on the Letter Templates button, you will be directed to a section that allows you to manage and organize letter templates for various communication needs. This section consists of two key tasks: Creating a Category and Creating a Template. Here’s a detailed breakdown:
a. Creating a Category
- Before creating letter templates, you must first create a category to organize them. The Category Form will allow you to define the type of letters you will be working with. This helps categorize letters into different groups for better organization.
Category Form Fields:
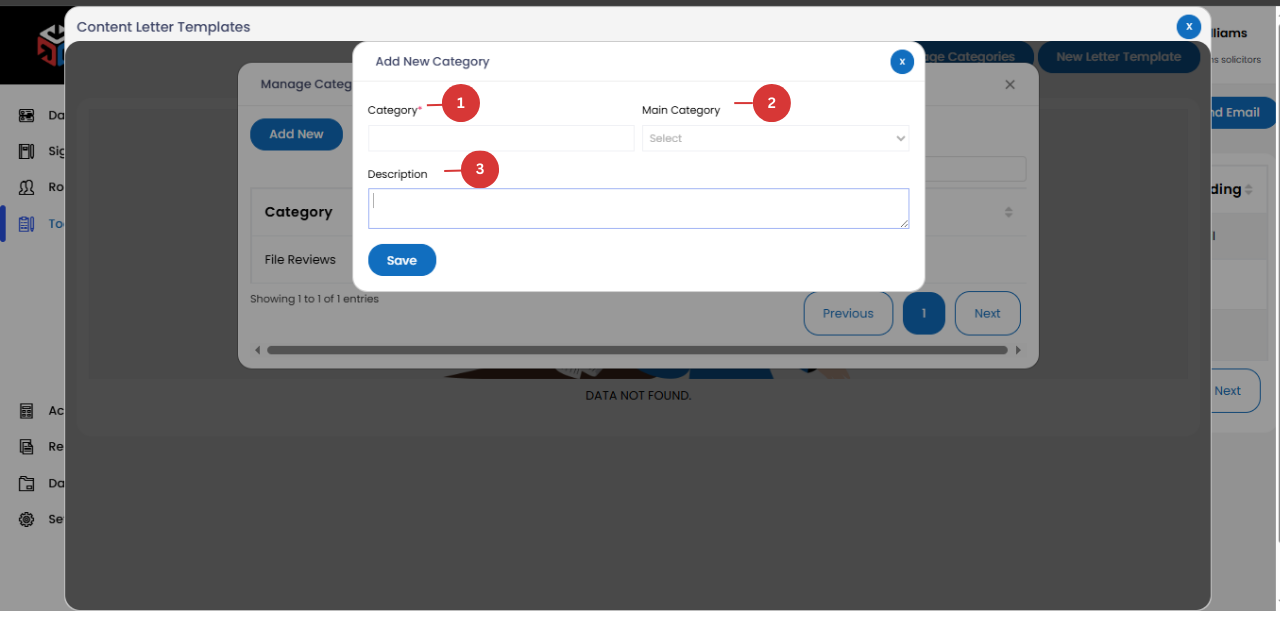
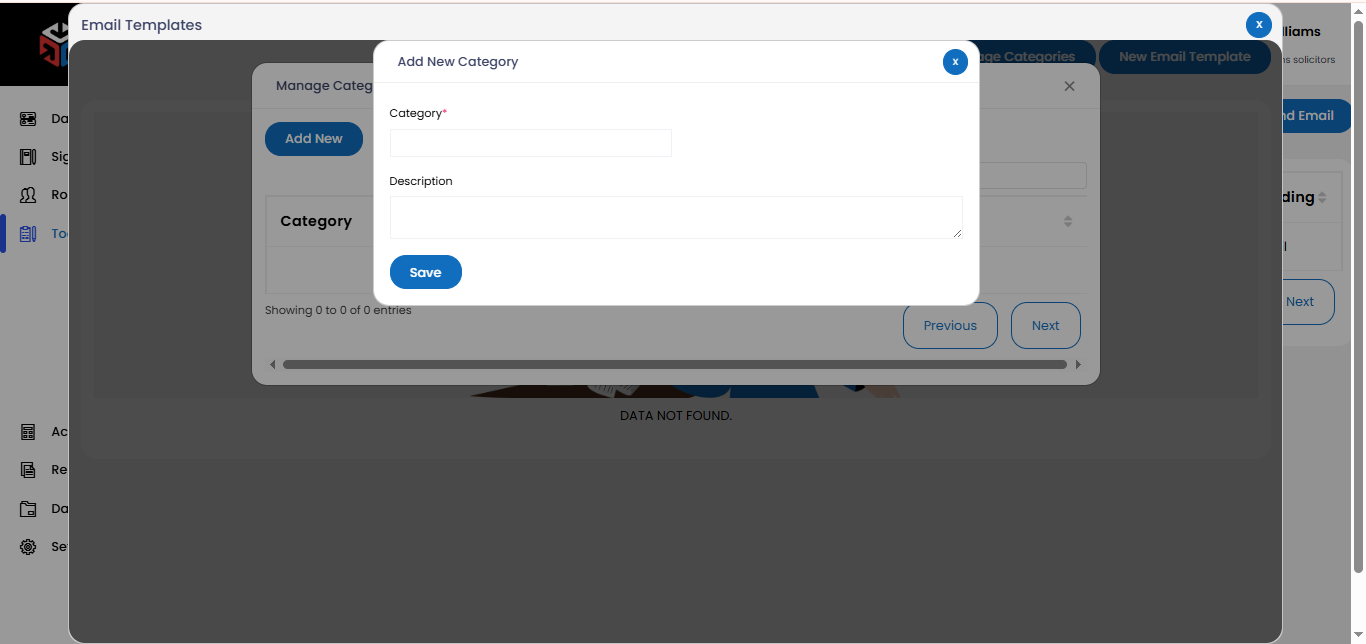
- Category (Required): Choose a name for the category (e.g., “Customer Notifications,” “Business Letters,” “Legal Notices”).
- Main Category: Select a main category to group this category under (e.g., “Customer Communication,” “Internal Business Letters”).
- Description: Add a brief description about the purpose or use case of the category (e.g., “Letters related to customer service and support”).
b. Creating a Template
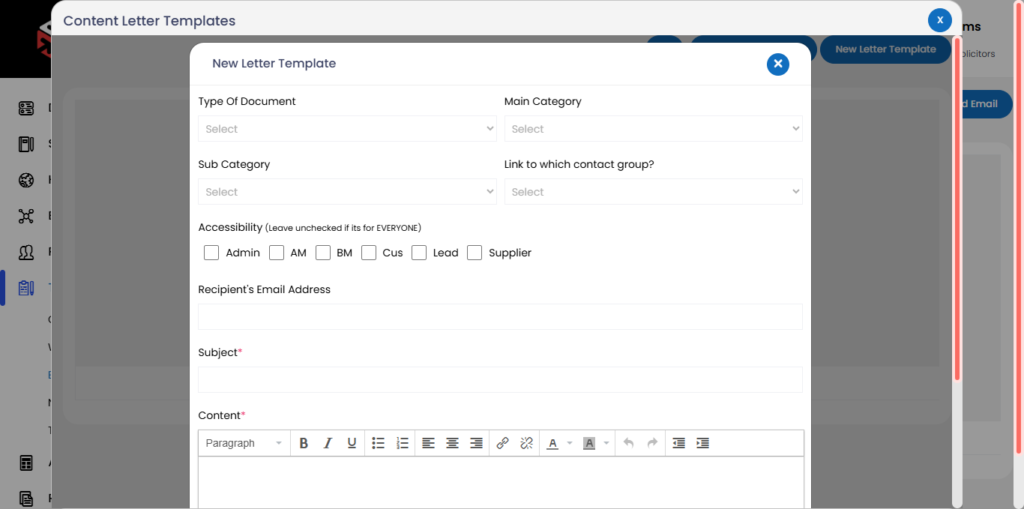
- Once a category is created, you can start adding templates under that category. The Template Form is where you define the content and usage details of the template.
Template Form Fields:
- Type of Document: Choose the type of document for the letter (e.g., “Formal Letter,” “Reminder,” “Notification”).
- Main Category: Select the main category under which this template will fall (this is the higher-level category from step 1).
- Sub Category: Define a more specific subcategory for the letter template (e.g., “Payment Reminder,” “Event Invitation”).
- Set Usage Level: Define who can use this template (this is optional):
- Admin
- Account Manager (AM)
- Business Development Manager (BDM)
- Branch Manager (BM)
- Customer
- Lead
- Supplier
- If you leave this unchecked, the template will be available for everyone.
- Subject (Required): Provide the subject line for the letter (e.g., “Payment Reminder,” “Event Invitation”).
- Content (Required): Write the content of the letter. You can include placeholders that will be replaced with actual data when sending the letter (e.g., customer name, event date).
2. Email Templates Button
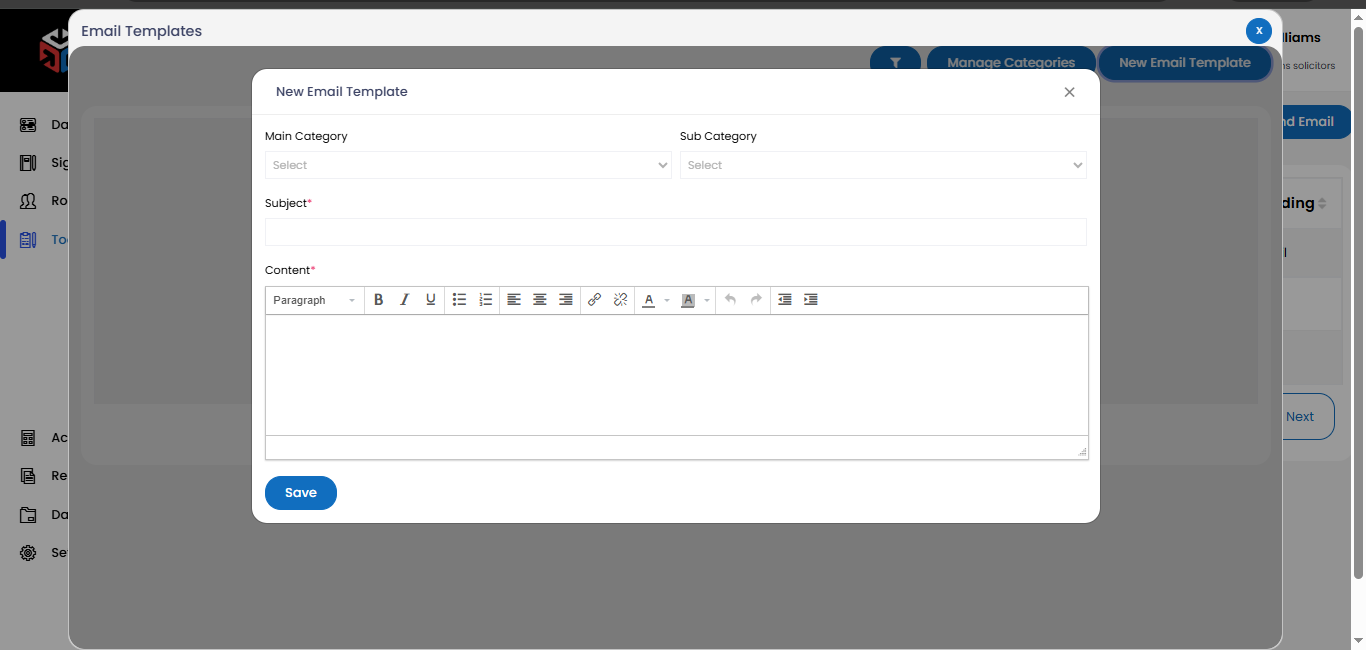
- Functionality: Clicking this will open a list of predefined email templates that can be reused. These templates can be used when sending emails to specific roles, such as customers, account managers, or leads.
a. Creating a Category
b. Creating Email Template
3. Send Email Button
Add Email – When clicking on the Add Email button, a popup window will appear, allowing you to send an email to a specific role or individual.
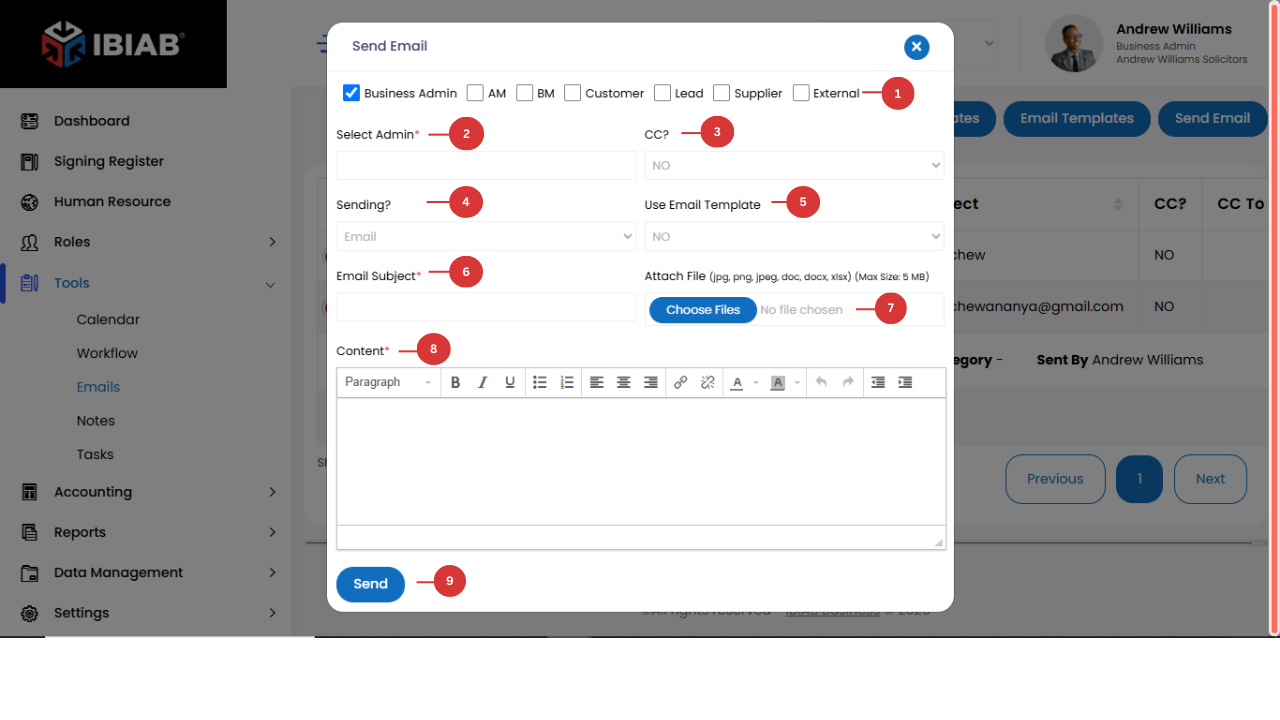
- Select a Role – Choose the specific role you want to send the email to (e.g., Administrator, Account Manager, Business Development Manager).
- Admin Input Field – Search for or manually enter the recipient’s email address.
- CC Field – If you choose Yes, an additional input field will appear where you can enter another email address to CC (copy) the email.
- Sending Method – Choose between:
- Email – Sends the message via email.
- Letter – Allows you to format the email as a formal letter.
- Email Templates – Use a predefined email template from your company’s email system.
- Email Subject Field – Enter the subject of your email.
- Attach Field – Upload any attachments (e.g., PDFs, documents, images).
- Content Field – Write the main content of your email.
Click Send to deliver the email.
📌 Tip: Double-check the email address and content before sending to ensure accuracy.