9.Data Management Module
A vital module for organizing and managing business documents that Enhances efficiency in handling essential paperwork.
Streamlines workflows and boosts productivity.
📂 Available Document Categories:
9.1 Order Forms – Standardized templates to streamline purchase and service orders.
9.2 Document Checklists – Lists to ensure all necessary documents are prepared and submitted.
9.3 Final Letters – Professionally crafted closing correspondence for various business needs.
9.4 Questionnaire Forms – Structured forms to gather client or stakeholder information.
9.5 Terms & Conditions – Clearly defined legal and policy statements for business agreements.
9.1 Order Forms – Manage and Store Order-Related Documents
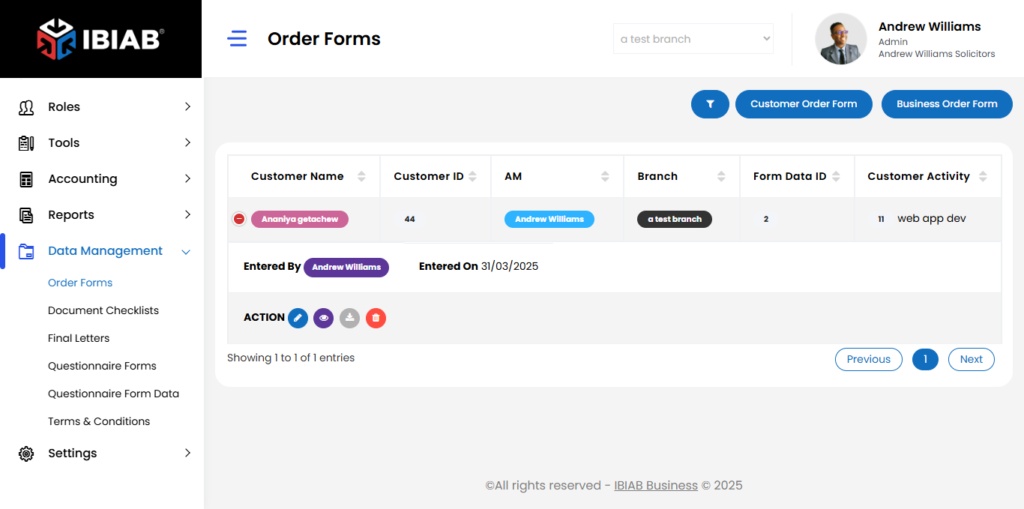
The Order Forms module allows your business to efficiently manage, store, and track all order-related documents exchanged with clients. This feature is crucial for keeping a clear and organized record of services or products requested by customers.
📄 Page Overview:
When you open the Order Forms page from the side menu, you’ll see a comprehensive table listing all order forms that have been sent to your clients.
🧾 Table Columns:
The table includes the following key details for each order form:
- Customer Name – Displays the full name of the client associated with the order.
- Customer ID – A unique identifier assigned to the customer.
- AM – The Account Manager responsible for handling that customer’s case.
- Branch – The branch location assigned to or managing the customer.
- Form Data ID – A unique identifier for the specific order form data submitted.
- Customer Activity – A summary or status of the customer’s activity linked to the order form.
📁 Order Form Types:
- Customer Order Form – Forms filled out or sent by the customer. These might include details about the service/product they are ordering, preferences, and personal info.
- Business Order Form – Standard or customized order templates generated by your business to be sent out to customers.
🛠️ Functions and Benefits:
- Quickly search, view, and manage forms associated with customer activities.
- Ensure compliance and record-keeping with automatically logged data.
- Streamline communication and workflow by centralizing all order documentation in one place.
- Differentiate between internal business templates and customer-submitted forms.
This section makes it easy to stay on top of all your business transactions and maintain clarity in your order processing flow.
9.2 Document Checklists – Organize and Maintain Required Document Lists
The Document Checklists section helps you organize and manage all the essential documents required for various business processes, client onboarding, or compliance tasks. It allows you to create categorized checklists, making it easy to ensure nothing is missed during document collection.
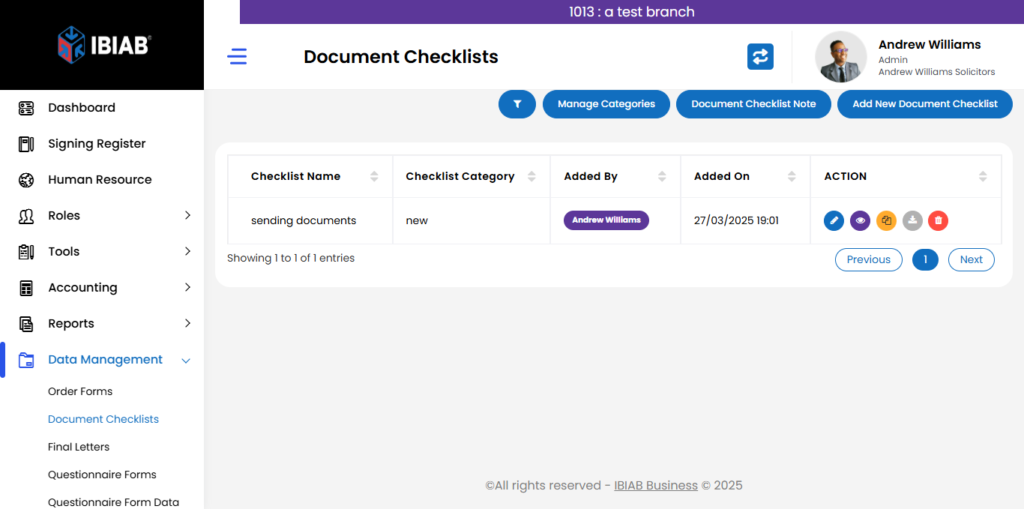
When the Document Checklists page loads, it displays a table listing all previously created checklists. This gives you a quick overview of what has been created, by whom, and when.
📑 Checklist Table Includes:
- Checklist Name – The title or purpose of the checklist.
- Checklist Category – The grouping or classification (e.g., Visa Application, Client Onboarding).
- Added By – The user who created the checklist.
- Added On – The date the checklist was added.
- ACTION – A set of buttons to manage each checklist:
- Edit – Update checklist information or structure.
- View – Preview the checklist and its items.
- Copy – Duplicate an existing checklist to save time.
- Download – Export the checklist for offline use or sharing.
- Delete – Permanently remove the checklist.
➕ Adding a New Checklist:
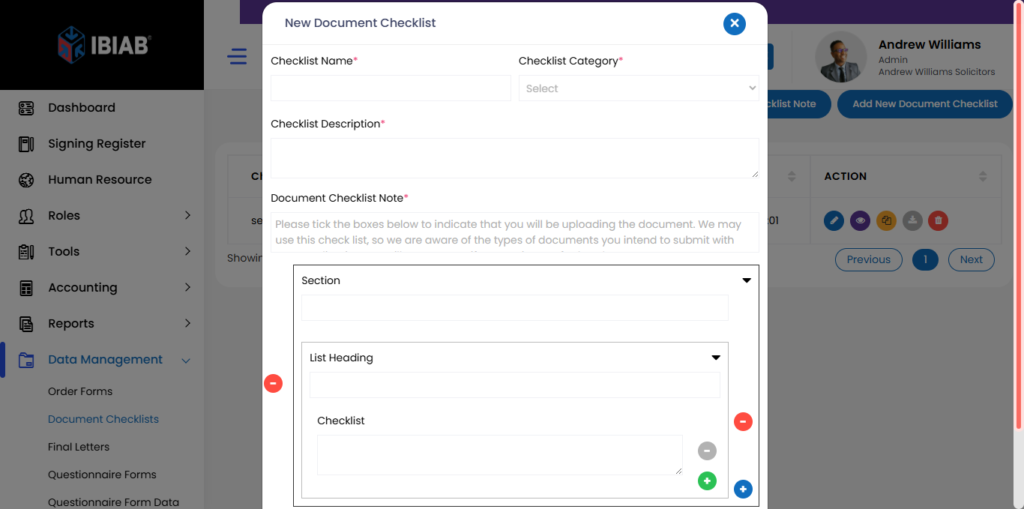
Click the “Add New Checklist” button to create a new document checklist. A popup form will appear with the following fields:
- Checklist Name* – Enter a title for the checklist.
- Checklist Category* – Select or assign the checklist to a category.
- Checklist Description* – Provide a detailed description of what the checklist is for.
- Document Checklist Note* – Add any extra notes or reminders related to the checklist.
You can also structure the checklist using:
- List Heading – Use this to separate sections within the checklist.
- Checklist – Add individual items/documents required in that section.
🗂️ Manage Categories:
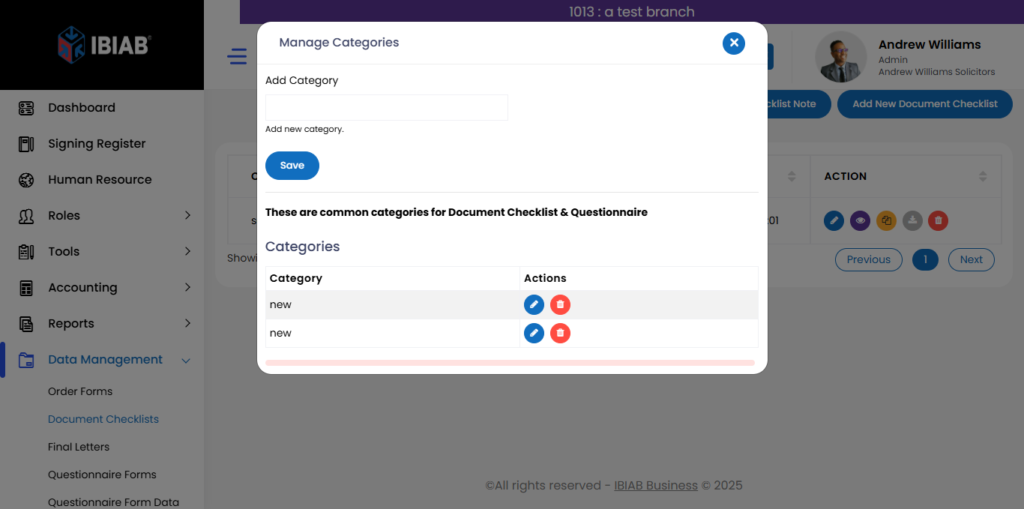
Use the “Manage Categories” button to add or edit categories that help you organize your checklists. Categories make it easier to filter, sort, and assign checklists across different business areas.
9.3 Final Letters – Store Finalized Correspondence for Easy Reference
The Final Letters module is designed to help you manage and store all finalized correspondence sent to your customers. It ensures that important communications are recorded, traceable, and easily accessible when needed—for internal reference, audits, or client support.
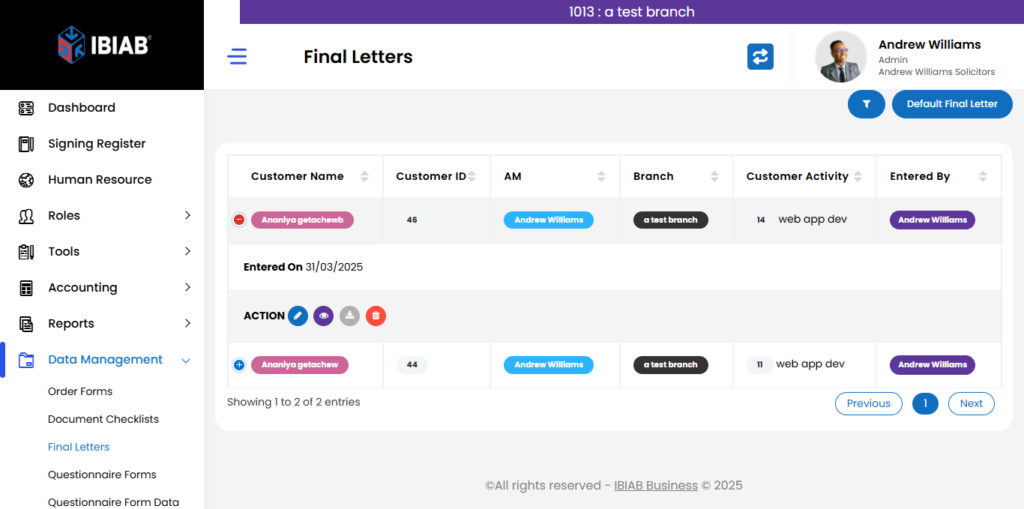
When the Final Letters page loads, it displays a table listing all previously sent final letters. This centralizes your communication history and provides a clear snapshot of letter activities across your organization.
📋 Table Columns Include:
- Customer Name – The name of the customer who received the final letter.
- Customer ID – The unique ID assigned to the customer.
- AM (Account Manager) – The account manager responsible for the customer.
- Branch – The business branch handling the customer.
- Customer Activity – The specific business activity or case related to the final letter.
- Entered By – The staff member who created or submitted the final letter.
⚙️ Set Default Final Letter:
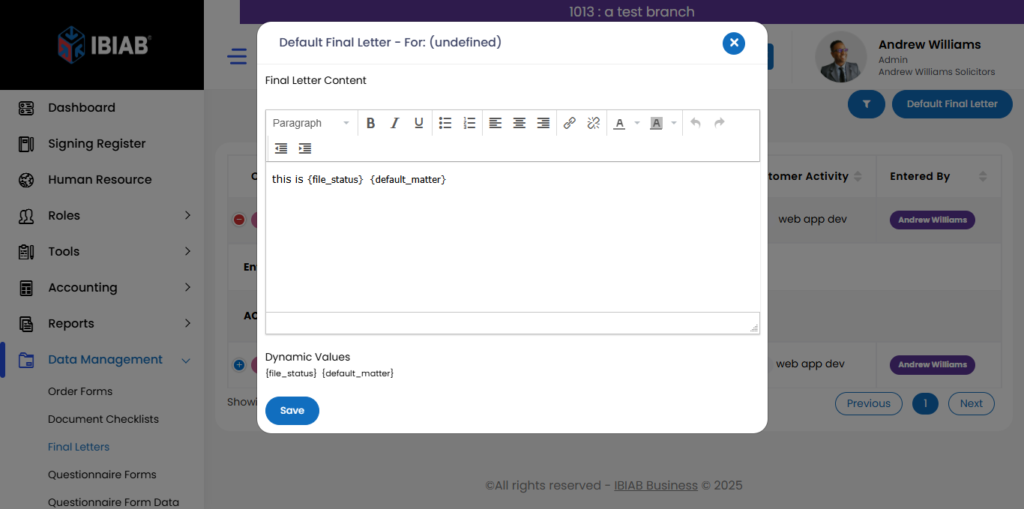
To streamline the process of sending standardized communication, you can use the “Set Default Final Letter” button located above the table. This allows you to pre-define a default final letter template, which will be automatically selected when composing future letters—saving time and ensuring consistency across all branches.
9.4 Questionnaire Forms – Manage Customer and Business-Related Surveys with Precision
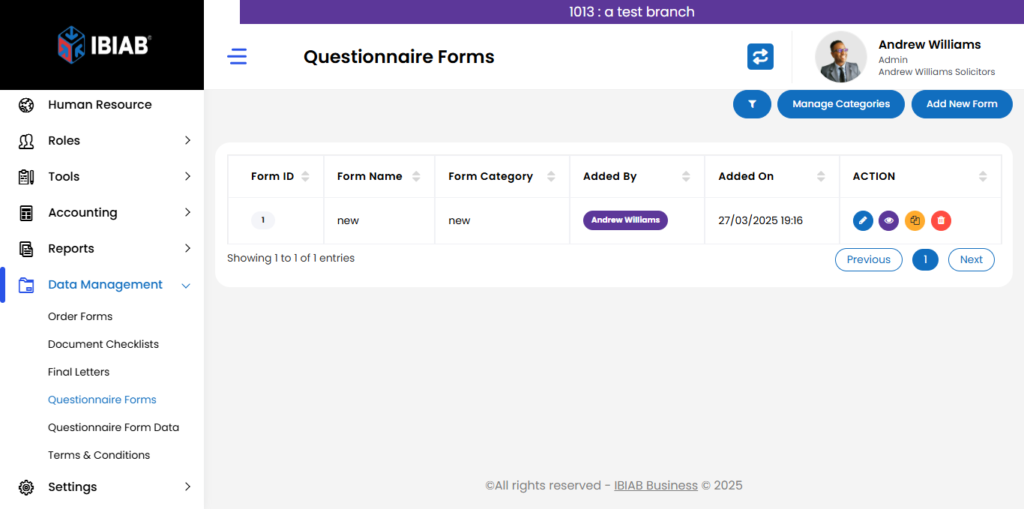
The Questionnaire Forms page is your central hub for creating, managing, and organizing all forms used to collect valuable data from customers or internal stakeholders. Whether it’s for onboarding, feedback, compliance, or lead qualification, questionnaires are a powerful way to capture insights and improve your operations.
A list of all previously created Questionnaire Forms displayed in a table format, showing the following columns:
- Form ID – Unique identifier for each form
- Form Name – The title of your questionnaire
- Form Category – Type or classification (e.g., Customer, Internal, Legal, etc.)
- Added By – Name of the staff who created the form
- Added On – Date the form was created
- Action – Quick access buttons to Edit, View, Copy, or Delete the form
➕ Create New Questionnaire Forms
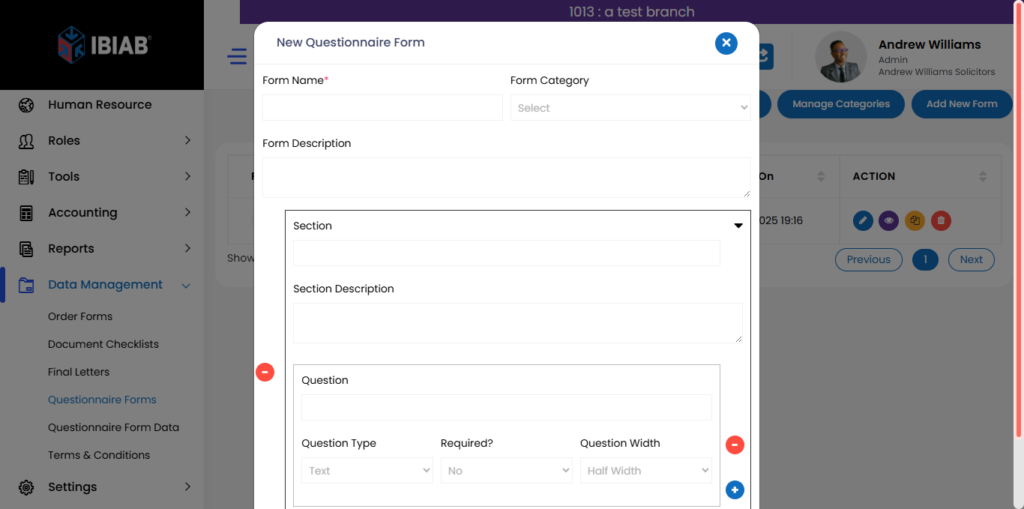
Click the “Add New Questionnaire Forms” button to open a popup where you can design a new form. You’ll be able to input:
- Form Name*
- Form Category*
- Form Description
- Section Title and Section Description
- Add multiple Questions, each with:
- Question Text
- Question Type (e.g., text input, multiple choice, dropdown)
- Required? toggle
- Question Width setting (for layout control)
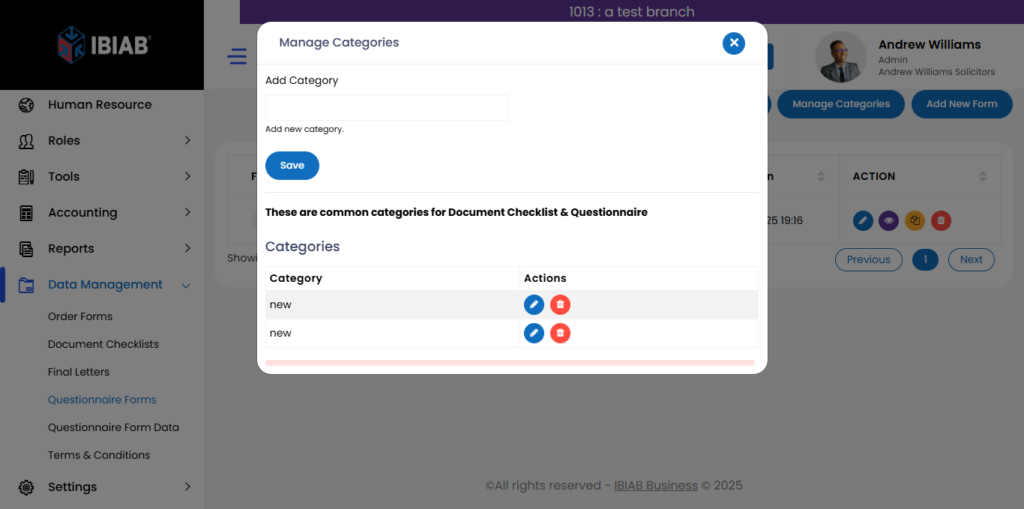
Use the “Manage Categories” button to add or edit categories to organize your forms better.
🧠 How SMEs Can Use Questionnaires Strategically
As your business grows, so does the need to better understand and serve your customers. Questionnaires can be deployed in various scenarios to gather targeted information that informs smarter decisions.
Key Use Cases:
- Market Research & Product Development – Validate features, test concepts, and reduce risks.
- Customer Satisfaction & Retention – Measure experiences and collect feedback to boost loyalty.
- Lead Qualification & Sales Insights – Identify and prioritize high-value prospects.
- Onboarding & Setup – Gather necessary setup information to streamline service delivery.
- Customer Segmentation & Personalization – Customize marketing and communication efforts.
- Event/Webinar Registration & Follow-Up – Plan better events and understand attendee needs.
- Testimonials & Case Studies – Collect real stories that build trust and credibility.
- Compliance & Legal Checks – Ensure data collection aligns with regulatory requirements.
✅ Final Thought:
Questionnaire Forms empower your team to work smarter—not harder—by automating data collection and converting customer input into action. Whether you’re refining services, guiding prospects, or fulfilling compliance needs, this tool ensures your questions lead to meaningful answers.
9.5 Terms & Conditions – Centralized Management of Your Business Policies
The Terms & Conditions page is designed to help you create, organize, and manage official policy documents related to various business services. These documents define the legal and procedural framework under which your services are delivered, ensuring transparency and regulatory compliance.
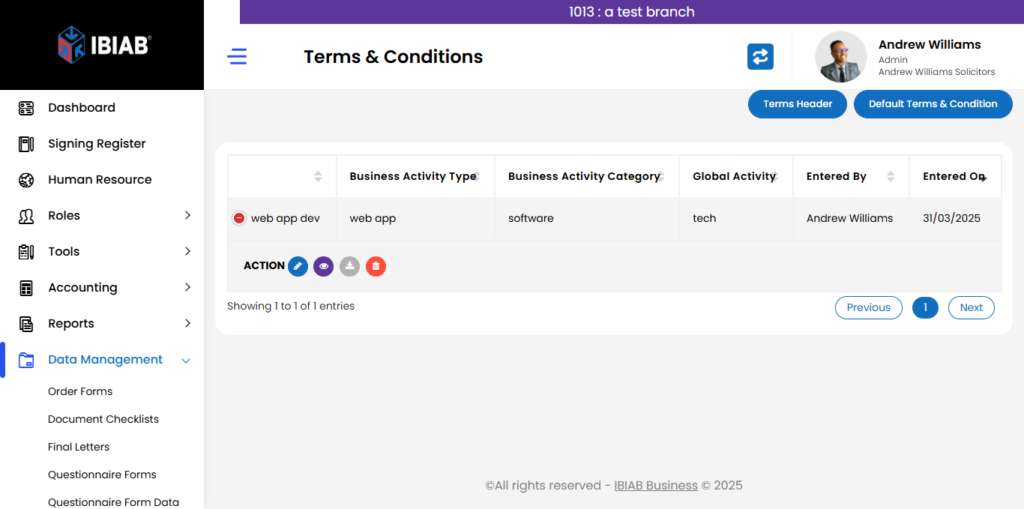
Upon loading, the page displays a structured table containing all previously created Terms & Conditions. The table includes the following columns:
- Business Activity Type – The specific service or product area these terms apply to
- Business Activity Category – Classification of the service (e.g., Immigration, Legal, Finance)
- Global Activity – Associated overarching global activity
- Entered By – Name of the staff who added the document
- Entered On – Date the document was created
Each entry gives you quick visibility into where and how each set of terms is applied across your business processes.
⚙️ Customization & Dynamic Values:
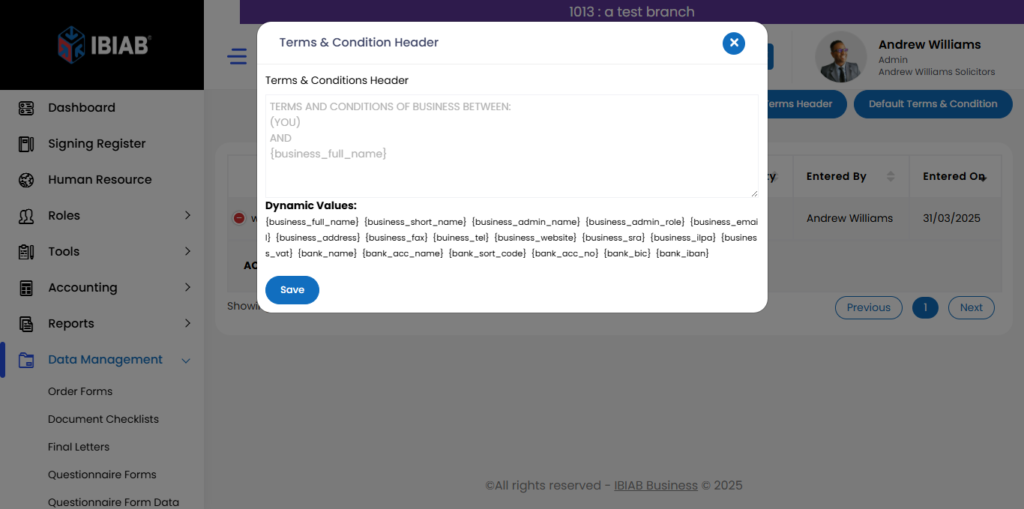
If you want to personalize your Terms Header, use the “Set Default Terms Header” button. You can enhance your document headers using Dynamic Values, such as:
{business_name}– Automatically inserts your business name{business_email}– Adds the registered business email{business_website}– Displays your website for quick reference- And more, depending on the type of business data you want to include
These dynamic placeholders ensure that the terms remain standardized yet personalized across different forms or customer documents.
🌐 Set a Default Terms & Conditions Document:
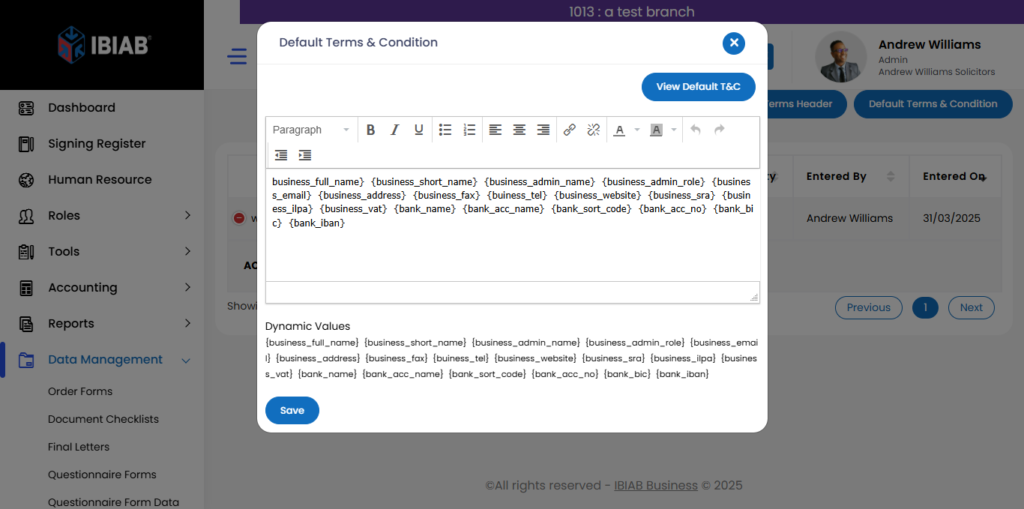
You can designate one document as the default Terms & Conditions by clicking the “Default Terms & Condition” button. This version will be automatically applied wherever a default is required (e.g., invoices, onboarding forms, or service agreements).
✅ Why It Matters:
Maintaining a centralized repository for your Terms & Conditions improves operational efficiency, legal consistency, and customer trust. It ensures that every service interaction is guided by clear, documented expectations—critical for both compliance and customer satisfaction.