
4.Branch
The Branches module helps you efficiently manage all your business locations.
The Branch section allows you to set up and manage different branch’s.
The Branch page allows you to manage and view all your business branches in one place. You can access it by clicking on Branch menu from the side menu—this opens a dropdown menu with a link to your Business Branch. Clicking this link will take you to the Branches page.
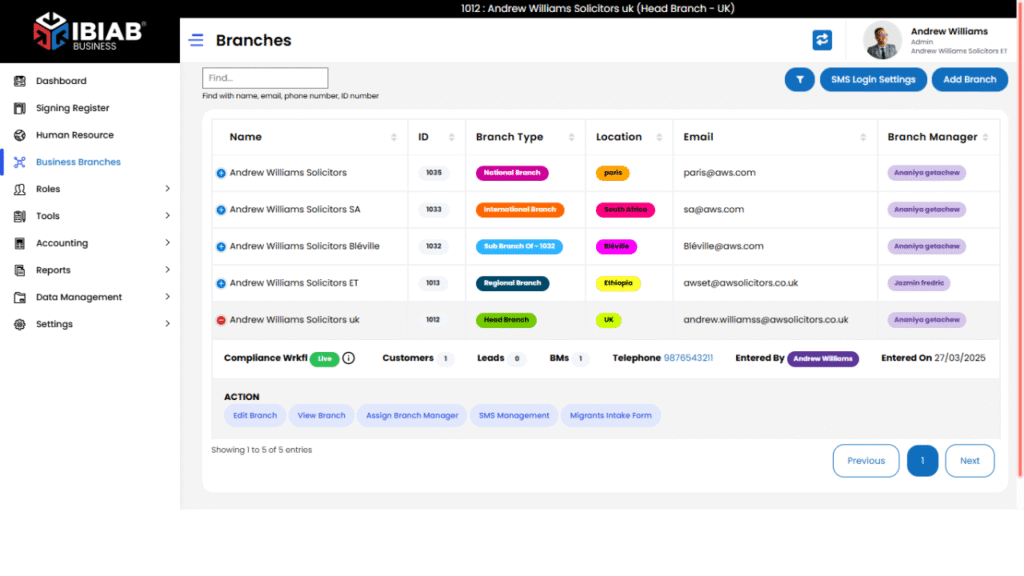
On the Branches page, you’ll see a table view listing all the branches you’ve created. The table displays key details, including:
- Name
- ID
- Branch Type
- Branch Manager
Each row in the table includes a plus (+) button, which when clicked, expands to reveal more action buttons: Assign Account Manager, Assign Branch Manager, and Customer Intake Form—making it easy to manage responsibilities within each branch.
To add a new branch, simply click the “Add Branch” button in the top-right corner. This opens a pop-up form where you can enter all necessary details to set up a new branch.
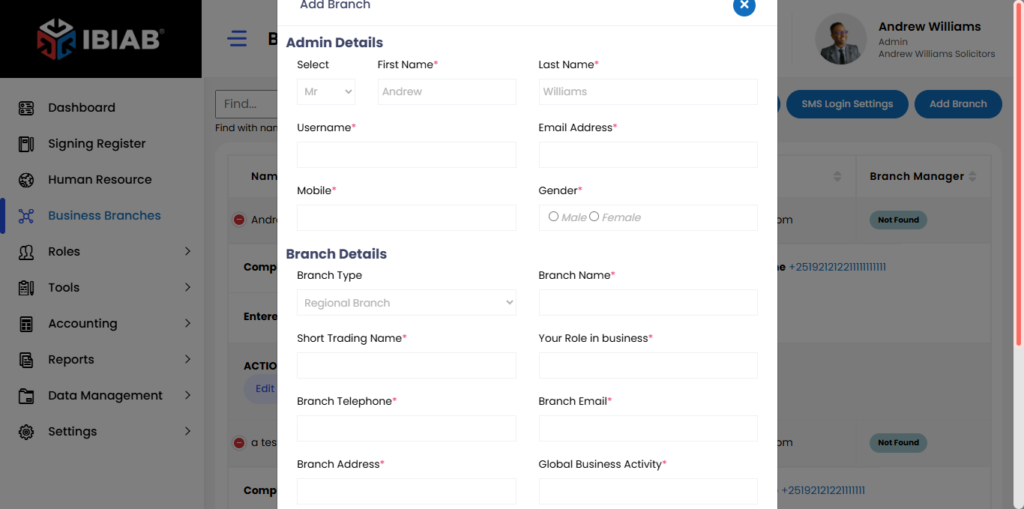
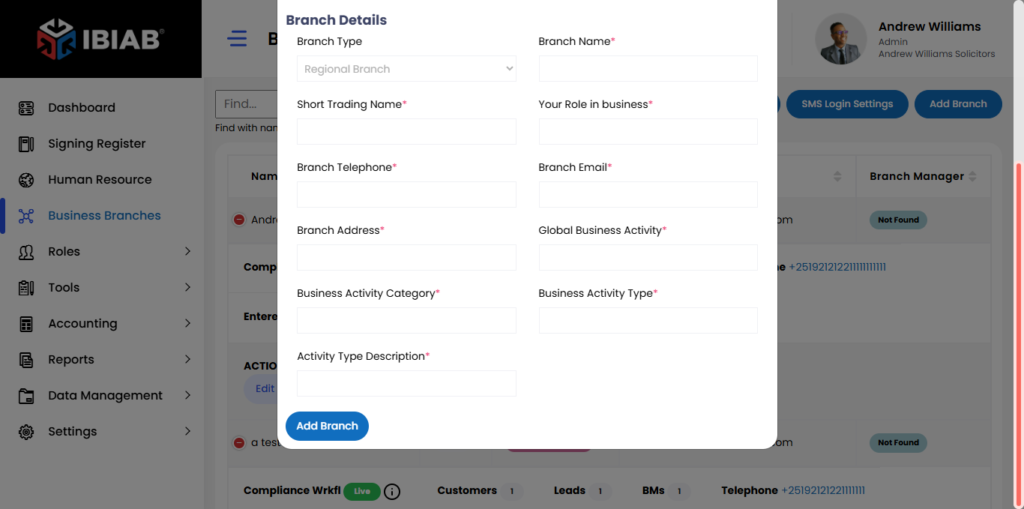
Branch Admin Registration have the following fields
Branch Details
- Branch Type – Choose if the branch is a Regional Branch, Sub Branch and Head Branch or another type.
- Branch Name* – Enter the official branch name.
- Short Trading Name* – Enter a brief trading name.
- Your Role in Business* – Define the admin’s role.
- Branch Telephone* – Provide the branch contact number.
- Branch Email* – Enter the branch’s official email.
- Branch Address* – Fill in the complete address.
Business Activity
- Global Business Activity* – Select the main business category.
- Business Activity Category* – Choose the specific category under the global activity.
- Business Activity Type* – Define the type of activity conducted.
- Activity Type Description* – Add details about the selected activity type.
- Once all fields are completed, click Save to register the Branch Admin
📌 Note: Fields marked with an asterisk (*) are mandatory and must be filled in before saving changes.
✅ Assign Account Manager – Allocate an account manager to oversee operations.
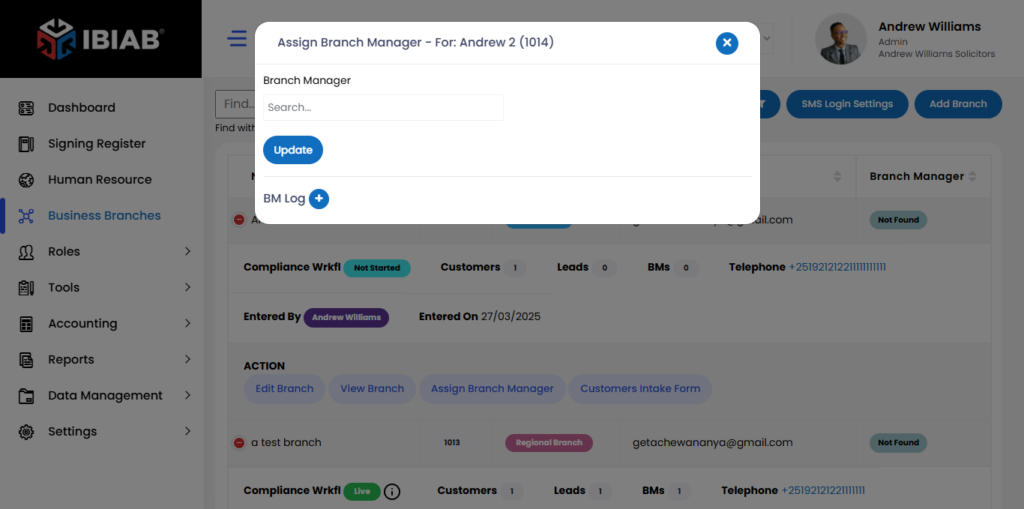
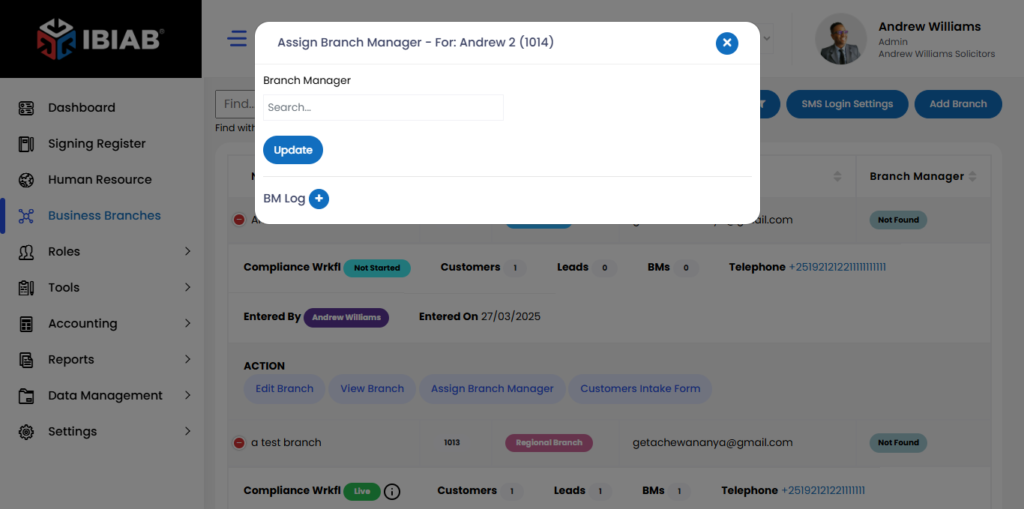
✅ Assign Branch Manager – Designate a branch manager for the branch.
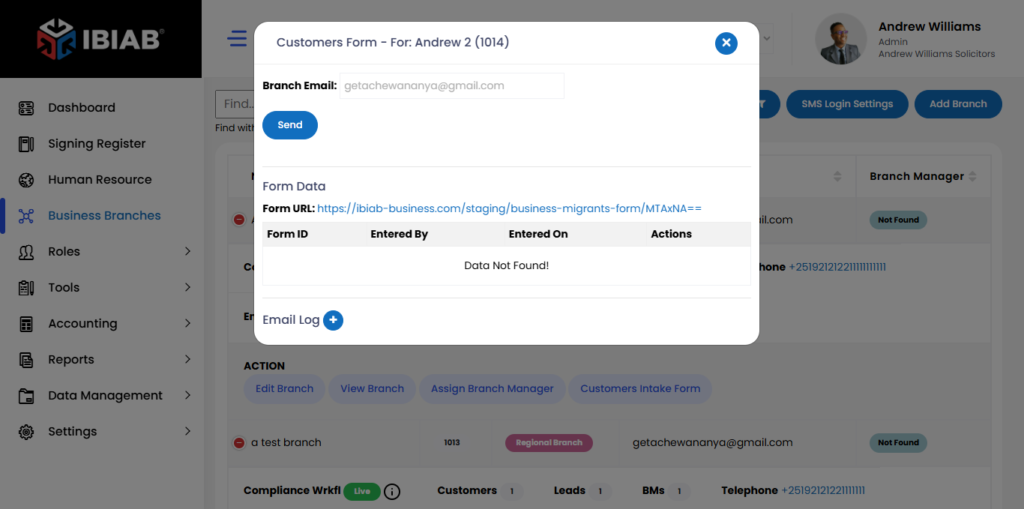
✅ Customer Intake Form – Register new customers under this branch.
Switching Between Branches
To easily switch between different branches within the system, use the blue button with the switch icon, typically found in the header or toolbar area. Clicking this button will open a pop-up list of all available branches linked to your account.
Once you select a branch from the list, the system will instantly update and filter all data—including customers, tasks, workflows, and documents—to reflect the selected branch. This feature ensures you always view and manage data specific to the branch you’re currently working with, improving efficiency and accuracy in multi-branch environments.
📌 Easily manage branch operations and staff assignments with just a click! 🚀